Marbled Design:
The History of Ancient Pottery volumes both has a unique design technique within their covers, endpapers, foredge, top edge, and tail edge known as Marbleising. The practice is a method of illuminating and decorating books with floating colors to demonstrate a fine pattern resonating sheer marble. The origins of the process are speculated to begin in Persia where the illustrations were found within manuscripts as early as the 16th century.
Analyzing the Pattern:
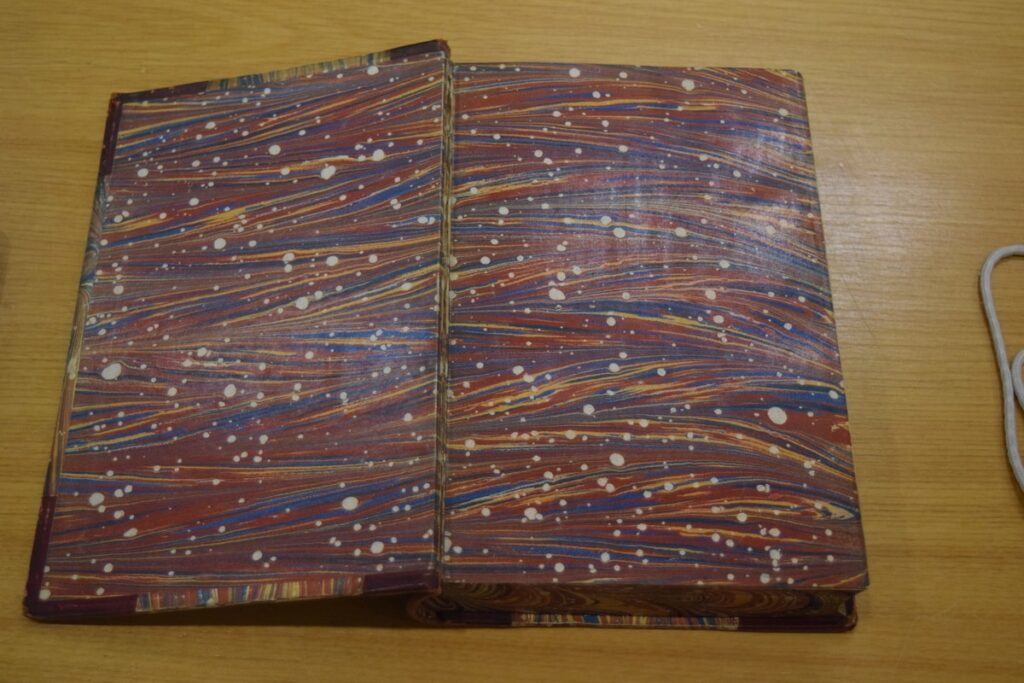
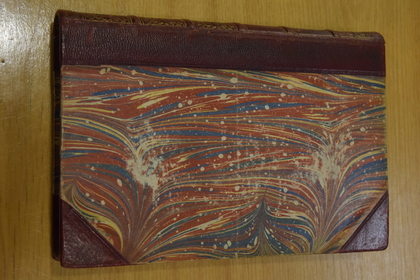
As seen in the images above, the color palette used within the volumes are a combination of dark tones of red, blue, yellow and white. The pattern is abstract and demonstrates a vibrancy that collectively navigates throughout its curved lines. The white dots expand throughout the surfaces of the endpaper and cover which give a splatter paint feel as the sizes vary throughout their respective surfaces. On the foredge top edge and tail edge, the craftsman continued the same structural pattern, however each side has a distinct base color tone. For example, the foredge pattern incorporates a higher degree of pinks, dark greys, and blues with its base an eminent yellow. The tailedge has a more consistent palette of orange, bloody red and tints of blue that lighten up the lower component. Furthermore, the top edge’s design demonstrates a lower quality with a grey overshadow that has eliminated the animation of the pattern that could be caused by the condition and age of the rare book.
The Creation of Marbled Paper:
The process of creating marbelized patterns is quite unique in its form. In classic marbleizing, the first step is to prepare the size, with mixing and boiling water, carrageen moss, and the size preservative for about 10 minutes. Then cold water must be added and then strained to eliminate any clumps to then sit covered for 24 hours until it turns into a consistency of jello. Moreover, the colors selected are mixed with water and then have inserted a minimal drop of ox gall to evade the pigments from blending together throughout the process. Furthermore, using a stick or brush tool, drops of chosen colors fall expanding into circles of 3 inches of width onto the surface. Finally, once the pattern and color is to the craftsman’s satisfaction, the paper is placed nicely flat onto the tray for the design to stick onto it and then placed to dry with a piece of cardboard overtop to prevent wrinkling.
– Mercy Perez ‘22